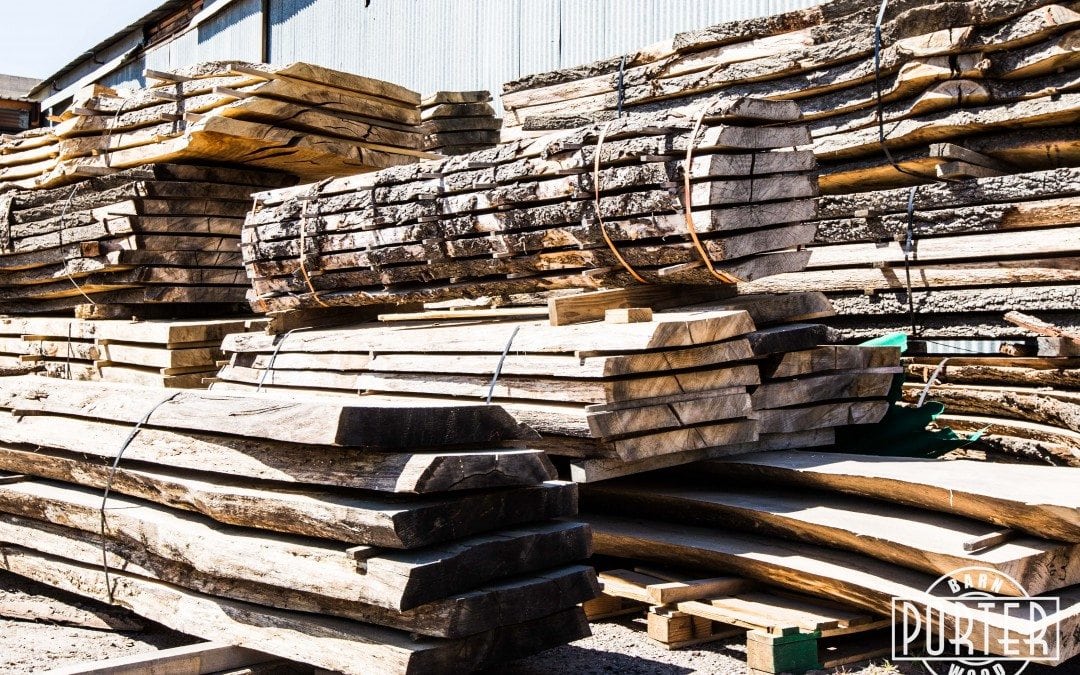
Live edge slabs have become super popular lately. There are a lot of people wanting to jump in on this gorgeous trend, but there are some things you need to know before taking on a such a project. “Live Edge”, also called (albeit not exactly correct) living edge, tree sections, flitches, bark edge, rough edge, tree slab, etc. is, quite simply, a tree that has been cut (sliced) all the way across and typically has the natural edge of the tree on either side exposed. This is where the cambium layer of the tree is (The cambium is a very thin layer of growing tissue that produces new cells that become either xylem, phloem or more cambium. Every growing season, a tree’s cambium adds a new layer of xylem to its trunk, producing a visible growth ring in most trees.)
One of the Greatest Resources: Frank Lloyd Wright said, “The best friend on earth of man is the tree: When we use the tree respectfully and economically, we have one of the greatest resources of the earth.” Milling lumber has been a staple of the American economy since the very early days of settlement. Practices for milling have become much more sustainable, and the great thing about most slabs today is that they come from landscape trees and not forests. We’ve also seen a lot of great slabs that come from dead standing trees and trees that have been killed in forest fires.
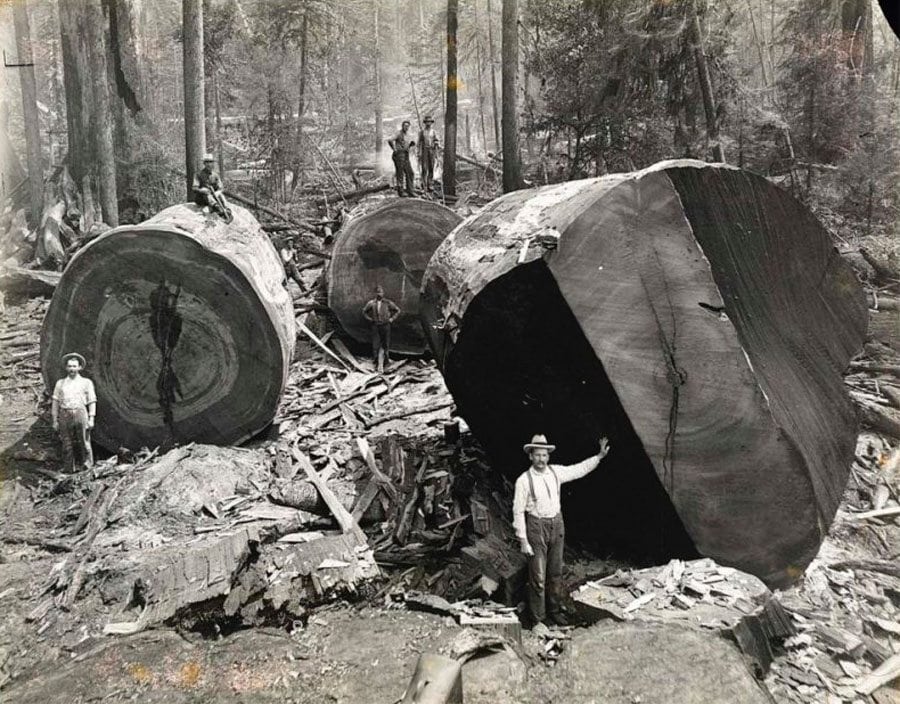
Big Trees: We don’t have a lot of trees around for milling the size of what they had in the early days, but there are still some slabs to be had in the 36-60 inch width range. Most of the time, this is about as big as the mills’ equipment is anyways. Length-wise, we can still find slabs in the 16-20ft+ range in various widths. The typical low-budget sawmill can do about 29″ in width and somewhere around 30″ in height. Most can do 16-20ft in length. Most slabbing operations like to have a portable mill rather than collect logs because it can require some very heavy duty equipment to get full size logs from one place to another. This has been the major struggle in the lumber industry as well. Portable rigs have their downside, primarily in the size of log it can mill.
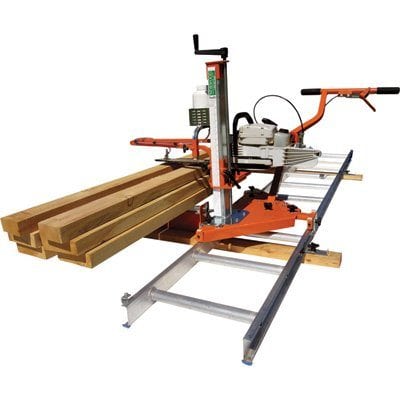
Chainsaw Mill: This uses a special bar and guide so you can use a chainsaw to mill a log on-site. This is the most common low-budget saw, but it is very effective. The biggest downside is the labor intensive method and the waste factor. The chainsaw’s kerf (blade thickness) is very wide and there is quite a bit of material being cut during the process. You will typically lose somewhere around 3/8″ of material, whereas a bandsaw mill may only lose 1/16″-1/8″. The cuts have a tendency to be a little more sloppy and rough. This is a product of the type of cut a chainsaw provides as well as the manual motion of the operator. For larger trees, however, this can be a great way to mill something that otherwise cannot be moved as a solid log. You can also purchase bars that are capable of widths larger than 72″ for a very reasonable price. You will, however, need to buy a pretty awesome chainsaw to power it.
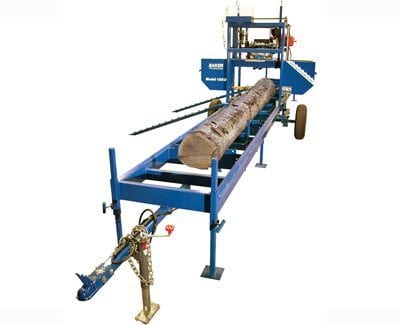
Bandsaw Mill: A bandsaw mill uses a gantry method with a (typically) horizontal bandsaw. The blade moves through a stationary log that is on a long track. This is the preferred method for slabbing because it is more economical for large production and there are more automated setups that require very little manual labor. Some of these saws even have dedicated control rooms with fully automated processes. They get pretty fancy! The downside of these mills is usually the capacity and initial cost.
Scraggs Mill: These mills have obvious downsides for slabbing, but are very practical for lumber manufacturing. They utilize a circular saw blade (typically) that can be pivoted at different angles to produce lumber in different grain orientations. The depth of the cut is usually limited to the blade-to-arbor distance, so it must be a very large blade to cut through even a fairly small log. A talented sawyer, however, can produce very fine graded lumber from a log using this setup and there are entry level scraggs mills that make lumber manufacturing desirable even for entry level wood milling enthusiasts.
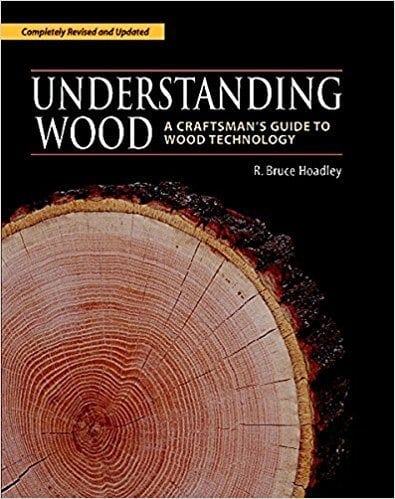
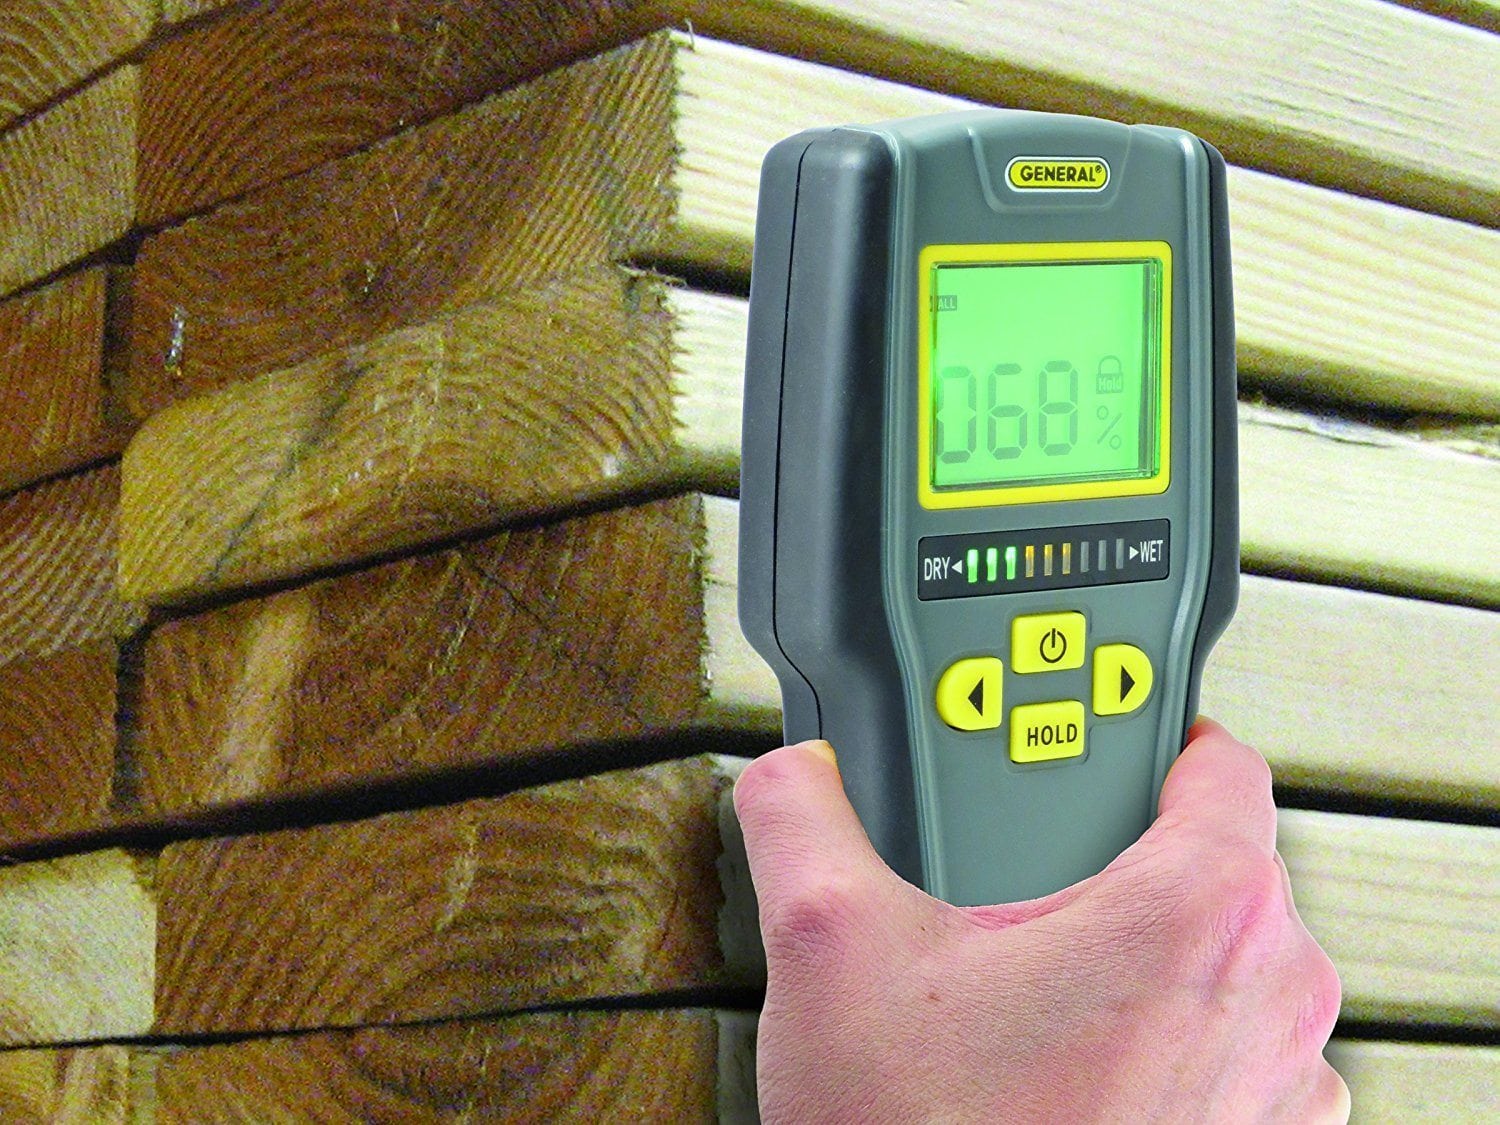
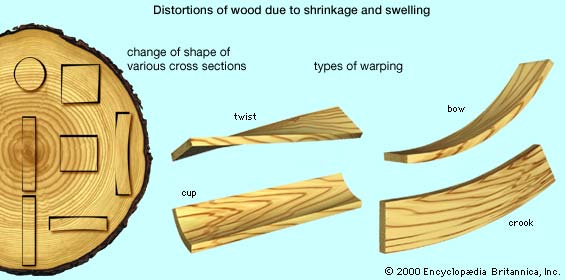
Moisture Content: This is the step that most people forget. There’s a lot of backyard hobbyist sawyers who cut up a lot of trees, and surely they look beautiful. However, the trees are very wet and over time that slab is going to do what wood does… it moves. Drying wood is more of an art than milling it most of the time. Trying to keep the lumber from moving, warping, twisting, and just making you frustrated in general, is quite the process. Wood, depending on the species, reacts differently to the process of drying. The most basic way to dry lumber is to “sticker stack” it. This consists of cutting the tree into sections and then stacking them with “stickers”, which are little pieces of equal size wood, that allows the pieces to breathe. The air travels across the top and the bottom of the slab so it can dry evenly. The common phrase in air-drying is “A year per inch”. Of course, that’s just a generalization. Woods like Sugar Pine in the softwoods family or Ironwood in the hardwood family, react completely different and it’s hard to say that is always true. The best way to gauge the dryness and the effectiveness of your drying process is to use moisture meters and spend a long time perfecting the process. There are some fantastic books on the process of milling and drying lumber and species identification. My favorite book is “Understanding Wood: A Craftsman’s Guide to Wood Technology” which covers way more than I could ever post about in a blog. It’s where I learned much of what I know about wood and how it reacts. Great read!!! As for moisture content, I like to see wood between 6% to 8.5%. This is easier to do in my hometown of Phoenix, AZ. I use a couple different types of moisture meters designed to accurately read the overall content through the entire slab of wood. If your slab is higher than this, even if it’s just in the center, it will likely crack, check, move, twist, and so on. If you’re lucky, and your slab provider knows about moisture content.
How to surface: It’s not always easy to surface a slab, especially if it has warped. A general rule for how much you’ll need to surface, assuming you want the whole thing to be flat on the top and the bottom, is to use “winding sticks” to see how far the slab it out. Usually, the slab has some waves and twist to it from the drying process. If you laid it on a flat surface and there is a gap of 1/2″ between your surface and the slab, you’ll have approximately 1″ of loss in thickness. Make sense? This is why most slabs start out much thicker. I like to have slabs a minimum of 2.5″ to 3″ thick so we can surface them down to 1.5″ to 2″ for countertops and table tops.
Machines: There are lots of ways to surface a slab, but for us, the easiest way is on the CNC router and wide belt sander. Most people don’t have access to these machines, so there are a few recommended ways to make sure you get a flat slab to work with. See the videos on the sidebar here for some great tutorials as well…
Router Jig: There are some simple DIY jigs for using a router as a manual CNC to flatten a slab. The great thing about these is that you can make a jig that is very large and tailored to your specific uses. The main thing to remember is to make sure that the jig is very sturdy and that you don’t hog off too much material at a time or you may end up skipping the router across the surface and causing damage to the slab with the bit. Watch a few of the youtube videos out there about making a router sled for surfacing and see which one seems to suit your purpose.
Drum Sanders / Belt Sander / Hand Planing: It is possible to use a hand planer if you know what you’re doing. If you have a good roughing plane and a great eye you can certainly make a flat slab using traditional tools. It will also provide hours of cathartic exercise. 🙂 If you’re like me, you like to use hand tools for the fine woodworking parts, but the big power tools for the roughing. If you have a drum sander that can handle the weight, this may prove a little tricky to bring in and out of the machine, but with a decent piece of plywood you can set up the slab and shim it to get it sturdy. If you allow the slab to go through without a plywood sled, you may end up seeing the slab rock or twist while it goes through and you’ll end up with a not-so-level piece of lumber. If you have a power hand planer and/or a good belt sander, you can take away the high spots and get the piece to sit flatter without having to shim it too aggressively.
Stepping Grits: It’s a good idea whenever you are sanding to a final finish to step up in grit as you go. When you are using a random orbit disc sander like we do, you should start with no harsher than about an 80 grit. Be careful not to use too much of an angle while sanding or you’ll end up with a bunch of swirls in the surface. Best practice is to take your time with the heavier grits and get a nice even finish. Then, blow off the dust and grit remaining on the surface and move to the next grit up. In our shop, we use 80 grit, then step up to 120, 180, and 220 for the final pass. Each time you step up in grit you should blow off the surface and look for the swirls that you can get rid of if necessary. By the time you get to 220, you should have a baby’s bottom like surface.
Truing it up for perpendicular edges: There is an order of operations you need to follow to make sure you get perfect 90º angles with your cuts. Ideally, you’ve surfaced the slab super flat. Then, if you’re trying to make the two ends parallel, you should eyeball a good line down the middle (maybe even make a light pencil line) so you can use that for reference to square. Using a good speed square or other marking tool that can give you a true 90º, mark a line for your cut on one end of the slab. Cut that line using a circular saw with a good blade. If you have a track saw, like the Festool, use this. If the slab is too thick, there are other larger circular saws available, or you can try and manage with a hand saw. Once you have a good clean straight edge, you can use that edge to measure out your parallel cut on the other end of the slab. Use the line you created to check for square, but generally, I like to square using a tape after I made my initial cut. If you have live edges on both sides, it can be tricky getting both of those cuts parallel. If you are using this slab for just 1 live edge and the other 3 are straight cuts, congratulations, you just made your life a lot easier. Cut the back line first and the other two can be done using a square.
Filling: There’s a lot of great ways to fill the gaps and voids that are in a slab, and they are very typical of a slab, so be ready to do some filling. We like to use a mixture of 2 part resin and coffee grounds. Generally, we use a fiberglass resin, but occasionally we’ll use a clear polyester casting resin and different materials like turquoise, abalone, pyrite, or other random stuff. This is generally how they do the glow in the dark ones too. You can also get away with a clear epoxy, but if you have never worked with epoxies or resins before, you should do a few test pieces before taking it on. There are loads of ways to mess it up, and nothing will make you more frustrated than having a bad epoxy pour. It adds hours of work to a project or worst case might ruin the entire thing. Filling is usually done before the final sanding but after surfacing. You’ll need to sand down the fill, typically, to the surface of the slab before it gets finish. If you’re using a clear cast, you may want to consider sanding to a much finer grit in order to allow for polishing or gloss finishes. If you’re using a satin finish, you may get away with less sanding, but the surface of the epoxy will need to be almost glass if you want to get that wet look shine of a gloss. I will usually step it down to 400 grit or so and then go even further with buffing compounds and a wheel in order to get it shiny before going to a finish coat. For flat lacquer and satin poly or oil, I’ll take it to 400 grit and then stop there. If you have thought, “I’ll just do the whole finish in epoxy and pour it all at once”, think again. There’s a weird thing that happens due to different surface tension of the slab vs. the hole that can cause irregularity on the surface of the piece you’re working with. In a professional epoxy pour, it’s usually multiple pours and possibly scuffing or surfacing in between to get it dead flat. It’s also very difficult to do it without bubbles forming. It’s quite a process. Watch some youtube videos of epoxy pour failures and learn from them. No use spending a lot of money on the process only to ruin a project. 🙂
Should I really attempt a slab project? Yes, of course, it’s super fun and looks fantastic. There’s something magical and organic about a live edge slab. It’s also possible to have much of the work done for you if you want to skip some of the more laborious tasks. We often surface and prepare slabs for people who want to finish sand, cut and finish/assemble their own furniture projects but just don’t have the means to flatten them. It’s fun to have a coffee table, dining table, desk, mantle, shelves, or loads of other live edge slab projects and know that YOU MADE IT! Go out there and hunt for a good slab, but do so knowing the kind of stuff you want to avoid beforehand so you don’t end up with a giant, wet, piece of wood that goes wonky on you and doesn’t end up becoming the piece you wanted to display. Feel free to shoot us questions anytime. We love hearing from you and are glad to offer services and materials to hep you with your project.
About the Author

Thomas Porter
Owner
Thomas is an Arizona native, artist, and man of many talents. He founded Porter Barn Wood in 2010 and Porter Iron Works in 2012. He has since become an industry leader in reclaimed materials in Arizona and has worked with builders across the country to provide custom unique furnishings and materials in both commercial and residential applications. Thomas and his wife Emy have two children and live in Phoenix, AZ.

